
Set up TekLan VPN on your Mac
Choose WireGuard or OpenVPN, create the configuration in the Dashboard and import it into the matching macOS app. You can also try the TekLan VPN Mac app beta through TestFlight.
This guide applies to Apple silicon and Intel Macs. The steps are the same across Mac models, although wording and permission prompts can vary slightly by macOS version.
Create and import a WireGuard tunnel
The Dashboard creates a dedicated .conf file for this Mac.
Before you begin
- Install the official WireGuard application for Mac.
- Have your TekLan VPN client-account sign-in ready.
- Allow the application to save and import a
.conffile.
Move the WireGuard profile to this device
After creating the profile, choose the delivery route that suits where the Dashboard is open.
- Download profile: save the
.conffile directly on this device. - Email: select Send profile, choose Email and select Queue email. The Dashboard sends the
.confattachment to the email address on the client account. - Device access code: select Send profile, then Get code. On this device, open dash.teklanvpn.com/get, enter the code and select Download profile. The code expires after 15 minutes and works once. Generating another code replaces it.
- Install WireGuard from the Mac App Store.
- Open your VPN service in the client area and select Manage VPN Dashboard.
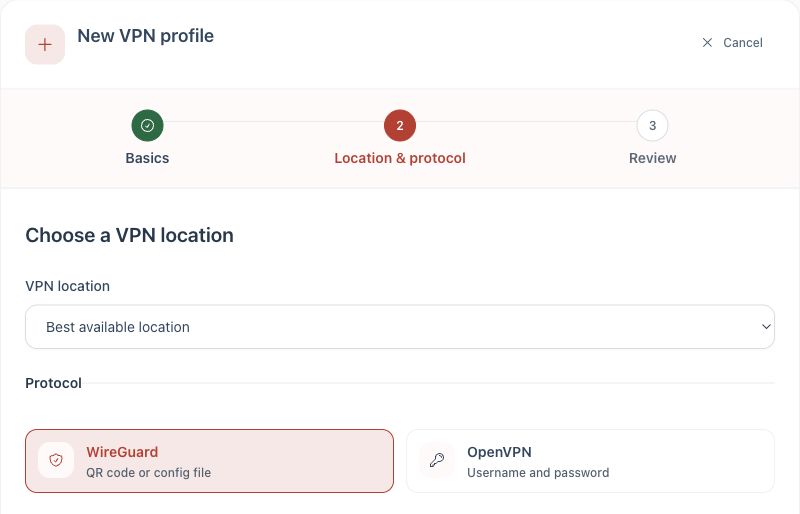
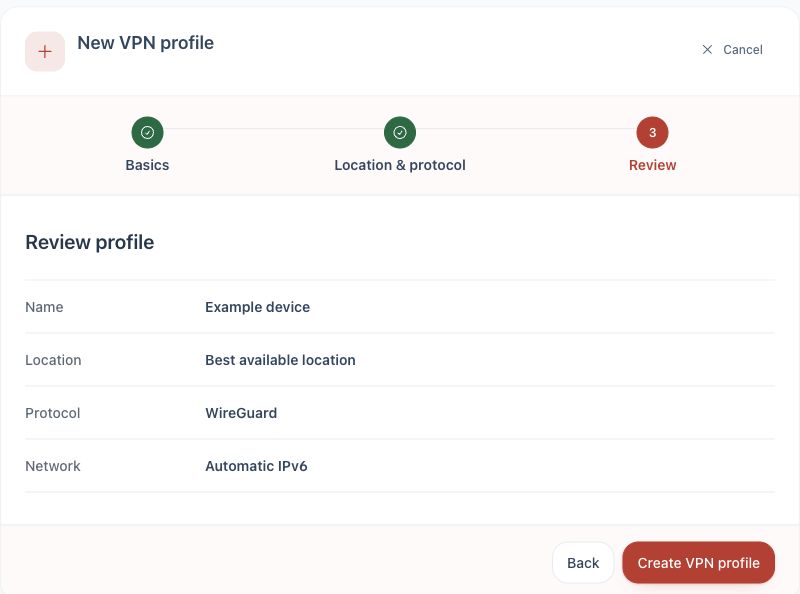
- Select Add device and name the Mac.
- Choose WireGuard, review the details and create the profile.
- Download the
.conffile. - In WireGuard, select Import tunnel(s) from file and choose the file.
- Approve the macOS VPN permission and activate the tunnel.
Check the connection
- Confirm the imported WireGuard tunnel remains switched on.
- Check that the operating system VPN indicator appears where supported.
- Open a browser and confirm the public IP address changes.
- Switch the tunnel off and confirm normal internet access returns.
If it does not connect
- Disconnect any other active VPN application or tunnel.
- Delete the failed tunnel and import a newly generated
.conffile. - Confirm the system date and time are correct.
- Note the exact WireGuard error before contacting support.
OpenVPN Connect on macOS
Before you begin
- Install OpenVPN Connect on Mac.
- Have your TekLan VPN client-account sign-in ready.
- Allow the application to save and import an
.ovpnfile.
Move the OpenVPN profile to this device
- Download profile: save the
.ovpnfile directly on this device. - Email: select Send profile, choose Email and select Queue email. The Dashboard sends the
.ovpnattachment to the email address on the client account. - OpenVPN credentials: select Show OpenVPN credentials and keep the displayed profile username and password available. The password unlocks the private key inside the file. It is not the client-area password.
Device access codes are for WireGuard profiles only. OpenVPN uses the downloaded or emailed .ovpn file with the credentials shown in the Dashboard.
- Download and install OpenVPN Connect for macOS.
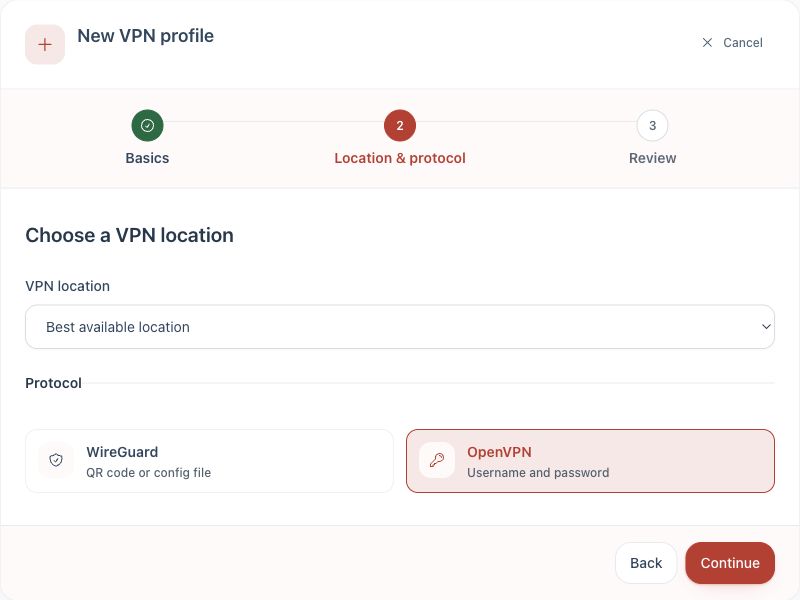
- Open your VPN service in the client area, launch the Dashboard and create an OpenVPN profile for this Mac.
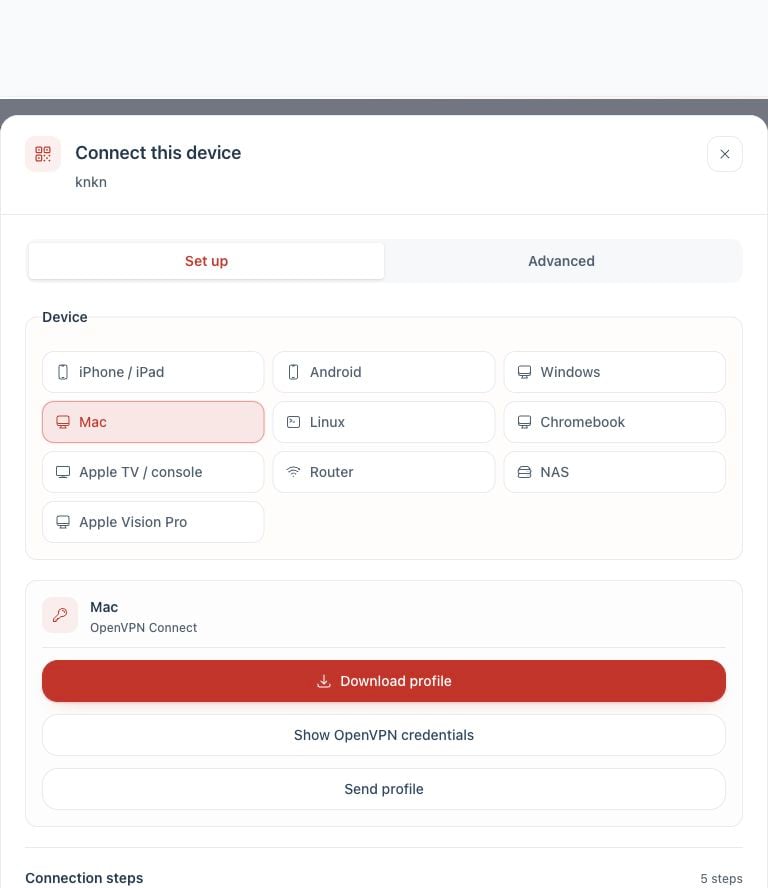
- Select Connect device on the profile and choose Mac.
- Choose Download profile, or use Send profile to deliver it to the Mac.
- In OpenVPN Connect, go to Menu → My Profiles → Add → Upload File and select the
.ovpnfile. - Confirm the import. If asked for the private-key password, use Show OpenVPN credentials in the Dashboard.
- Toggle the imported profile to connect.
Check the connection
- Confirm OpenVPN Connect reports the imported profile as Connected.
- Check that the operating system VPN indicator appears where supported.
- Open a browser and confirm the public IP address changes.
- Disconnect the profile and confirm normal internet access returns.
If it does not connect
- Use Show OpenVPN credentials in the Dashboard if the app requests the private-key password.
- Disconnect another active VPN before retrying.
- Delete the failed profile and import a newly downloaded
.ovpnfile. - Note the exact OpenVPN error before contacting support.
- Once the connection is established, you're ready to browse securely.
TekLan VPN Mac App Beta
The TekLan VPN app for Mac is in beta and available through Apple TestFlight. It runs on Apple silicon and Intel Macs with macOS 14 Sonoma or later.
Before you begin
- Update this Mac to macOS 14 Sonoma or later.
- Have your TekLan VPN client-account email address and password ready.
- Allow the app to add a VPN configuration when macOS asks.
- Install TestFlight from the Mac App Store.
- Open the TekLan VPN TestFlight link on this Mac and select Accept, then Install.
- Open TekLan VPN and sign in with the email address and password for your client account.
- Choose a server and select Connect. Approve the macOS VPN permission when prompted.
Check the connection
- Confirm the TekLan VPN app reports Connected.
- Open a browser and confirm the public IP address changes.
- Disconnect in the app and confirm normal internet access returns.
Beta builds can change often. If the beta does not work for you, use the WireGuard or OpenVPN route and tell our support team what happened.
TekLan VPN for Mac (beta)
Install through TestFlight, sign in with your client account and connect without importing a configuration file.