
Set up TekLan VPN on Windows
Use the TekLan VPN app for the quickest start, or configure WireGuard or OpenVPN through the Dashboard.
TekLan VPN Windows App
Follow these steps to install and use the TekLan VPN Windows App:
The current Windows installer is version 1.6.1.
A new TekLan VPN app for Windows is in beta. Download the beta installer or read about beta access. The beta installer is not yet code-signed, so Windows SmartScreen may show a warning before it runs.
Before you begin
- Connect the Windows computer to the internet.
- Have your TekLan VPN client-account email address and password ready.
- Allow app installation and approve the system VPN request when prompted.
- Download the installer from Windows installer.
- Locate the downloaded file and run it. If you encounter permissions issues, run as administrator.
- Open the TekLan VPN Windows app and log in with your username and password (your email and chosen password during sign‑up).
- Select a connection in the app and choose Connect. Approve the Windows VPN permission if prompted.
Check the connection
- Confirm the TekLan VPN app reports Connected.
- Check that the system VPN indicator remains visible where supported.
- Open a browser and confirm the public IP address changes.
- Disconnect in the app and confirm normal internet access returns.
If it does not connect
- Confirm the Windows computer has internet access before starting the VPN.
- Disconnect any other VPN application.
- Approve the system VPN request if it appears again.
- Sign out, restart the app and sign in again.
TekLan VPN for Windows
Install the app, sign in with your client account and connect without importing a configuration file.
Create and import a WireGuard tunnel
Use one Dashboard profile for this Windows computer. The generated .conf file contains the settings required by the WireGuard app.
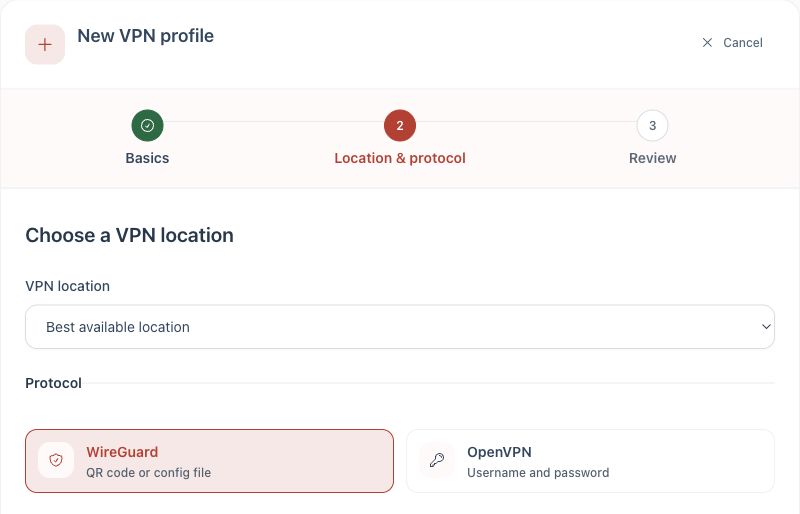
.conf file.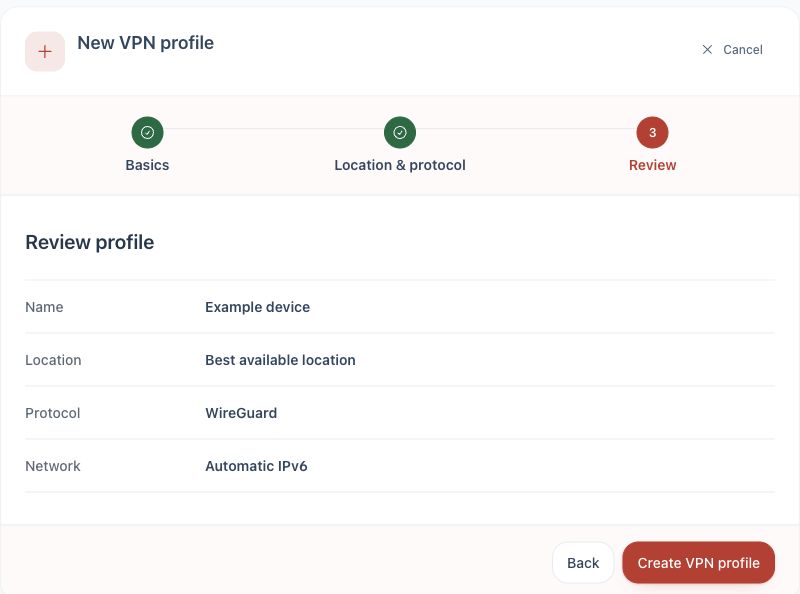
Before you begin
- Install the official WireGuard application for Windows.
- Have your TekLan VPN client-account sign-in ready.
- Allow the application to save and import a
.conffile.
Move the WireGuard profile to this device
After creating the profile, choose the delivery route that suits where the Dashboard is open.
- Download profile: save the
.conffile directly on this device. - Email: select Send profile, choose Email and select Queue email. The Dashboard sends the
.confattachment to the email address on the client account. - Device access code: select Send profile, then Get code. On this device, open dash.teklanvpn.com/get, enter the code and select Download profile. The code expires after 15 minutes and works once. Generating another code replaces it.
- Install the WireGuard app for Windows.
- Sign in to the TekLan VPN client area, open your VPN service and select Manage VPN Dashboard.
- Select Add device and enter a name that identifies this computer.
- Choose WireGuard, review the profile and select Create VPN profile.
- Download the generated
.conffile. - In WireGuard, select Import tunnel(s) from file and choose the downloaded file.
- Activate the new tunnel. Windows will ask for permission to create the VPN connection the first time.
Check the connection
- Confirm the imported WireGuard tunnel remains switched on.
- Check that the operating system VPN indicator appears where supported.
- Open a browser and confirm the public IP address changes.
- Switch the tunnel off and confirm normal internet access returns.
If it does not connect
- Disconnect any other active VPN application or tunnel.
- Delete the failed tunnel and import a newly generated
.conffile. - Confirm the system date and time are correct.
- Note the exact WireGuard error before contacting support.
OpenVPN Connect on Windows
Follow these instructions to configure OpenVPN Connect on your Windows device:
Before you begin
- Install OpenVPN Connect on Windows.
- Have your TekLan VPN client-account sign-in ready.
- Allow the application to save and import an
.ovpnfile.
Move the OpenVPN profile to this device
- Download profile: save the
.ovpnfile directly on this device. - Email: select Send profile, choose Email and select Queue email. The Dashboard sends the
.ovpnattachment to the email address on the client account. - OpenVPN credentials: select Show OpenVPN credentials and keep the displayed profile username and password available. The password unlocks the private key inside the file. It is not the client-area password.
Device access codes are for WireGuard profiles only. OpenVPN uses the downloaded or emailed .ovpn file with the credentials shown in the Dashboard.
- Download and install the OpenVPN Connect app from OpenVPN for Windows.
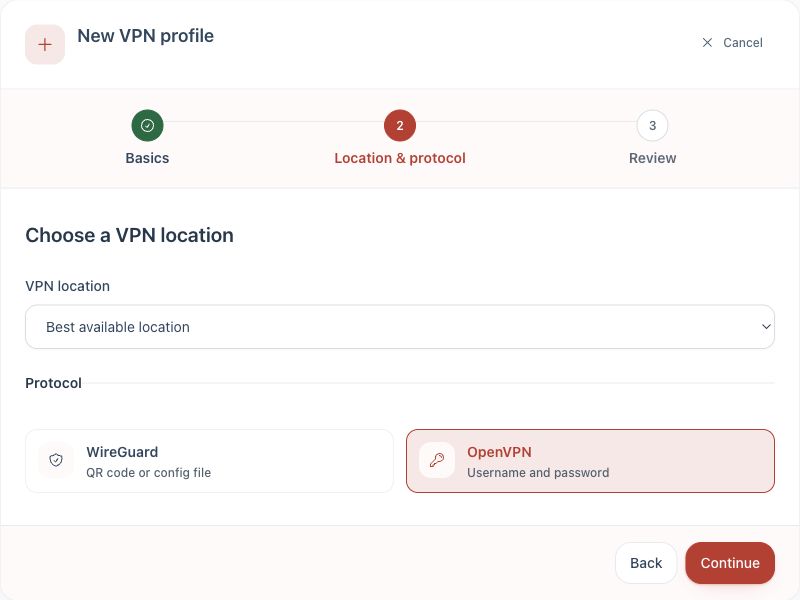
- Open your VPN service in the client area, launch the Dashboard and create an OpenVPN profile for this computer.
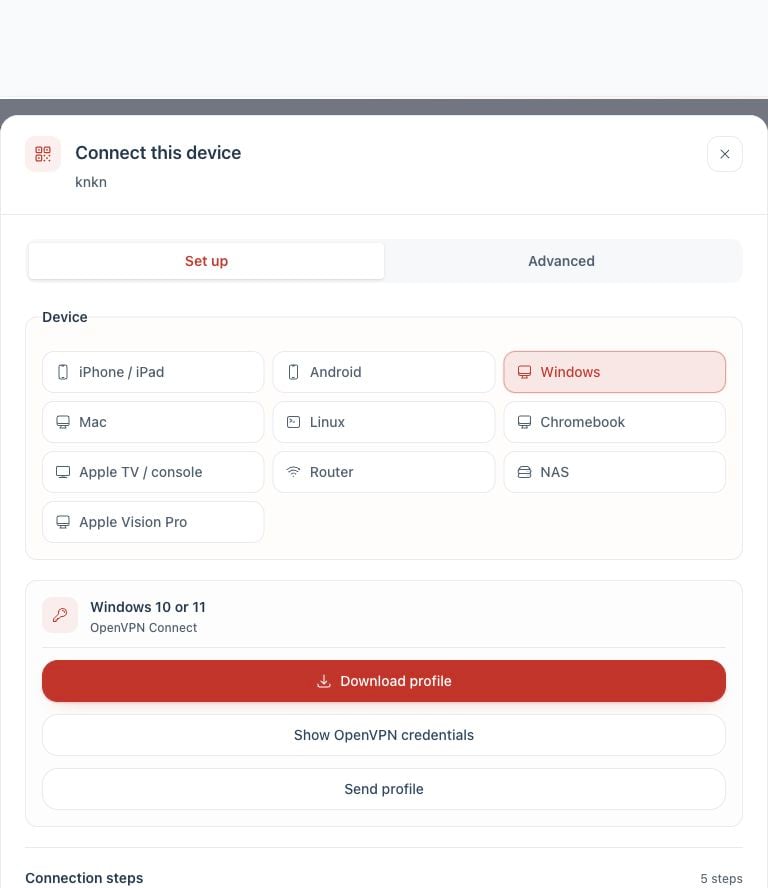
- On the finished profile, select Connect device and choose Windows.
- Choose Download profile, or use Send profile to deliver it to the Windows computer.
- In OpenVPN Connect, go to Menu → My Profiles → Add → Upload File and select the
.ovpnfile. - Confirm the import. If asked for the private-key password, use Show OpenVPN credentials in the Dashboard.
- Toggle the imported profile to connect.
Check the connection
- Confirm OpenVPN Connect reports the imported profile as Connected.
- Check that the operating system VPN indicator appears where supported.
- Open a browser and confirm the public IP address changes.
- Disconnect the profile and confirm normal internet access returns.
If it does not connect
- Use Show OpenVPN credentials in the Dashboard if the app requests the private-key password.
- Disconnect another active VPN before retrying.
- Delete the failed profile and import a newly downloaded
.ovpnfile. - Note the exact OpenVPN error before contacting support.